

New homeowners are increasingly turning one dedicated room into something far more valuable than a spare bedroom. Building a movie theater at home has moved well past luxury status – recent consumer polling highlights this shift, with 44% of adults stating they find it more enjoyable to watch movies at home, compared to just 16% who still favor the commercial theater experience. That kind of growth reflects a real shift in how people want to spend time at home.
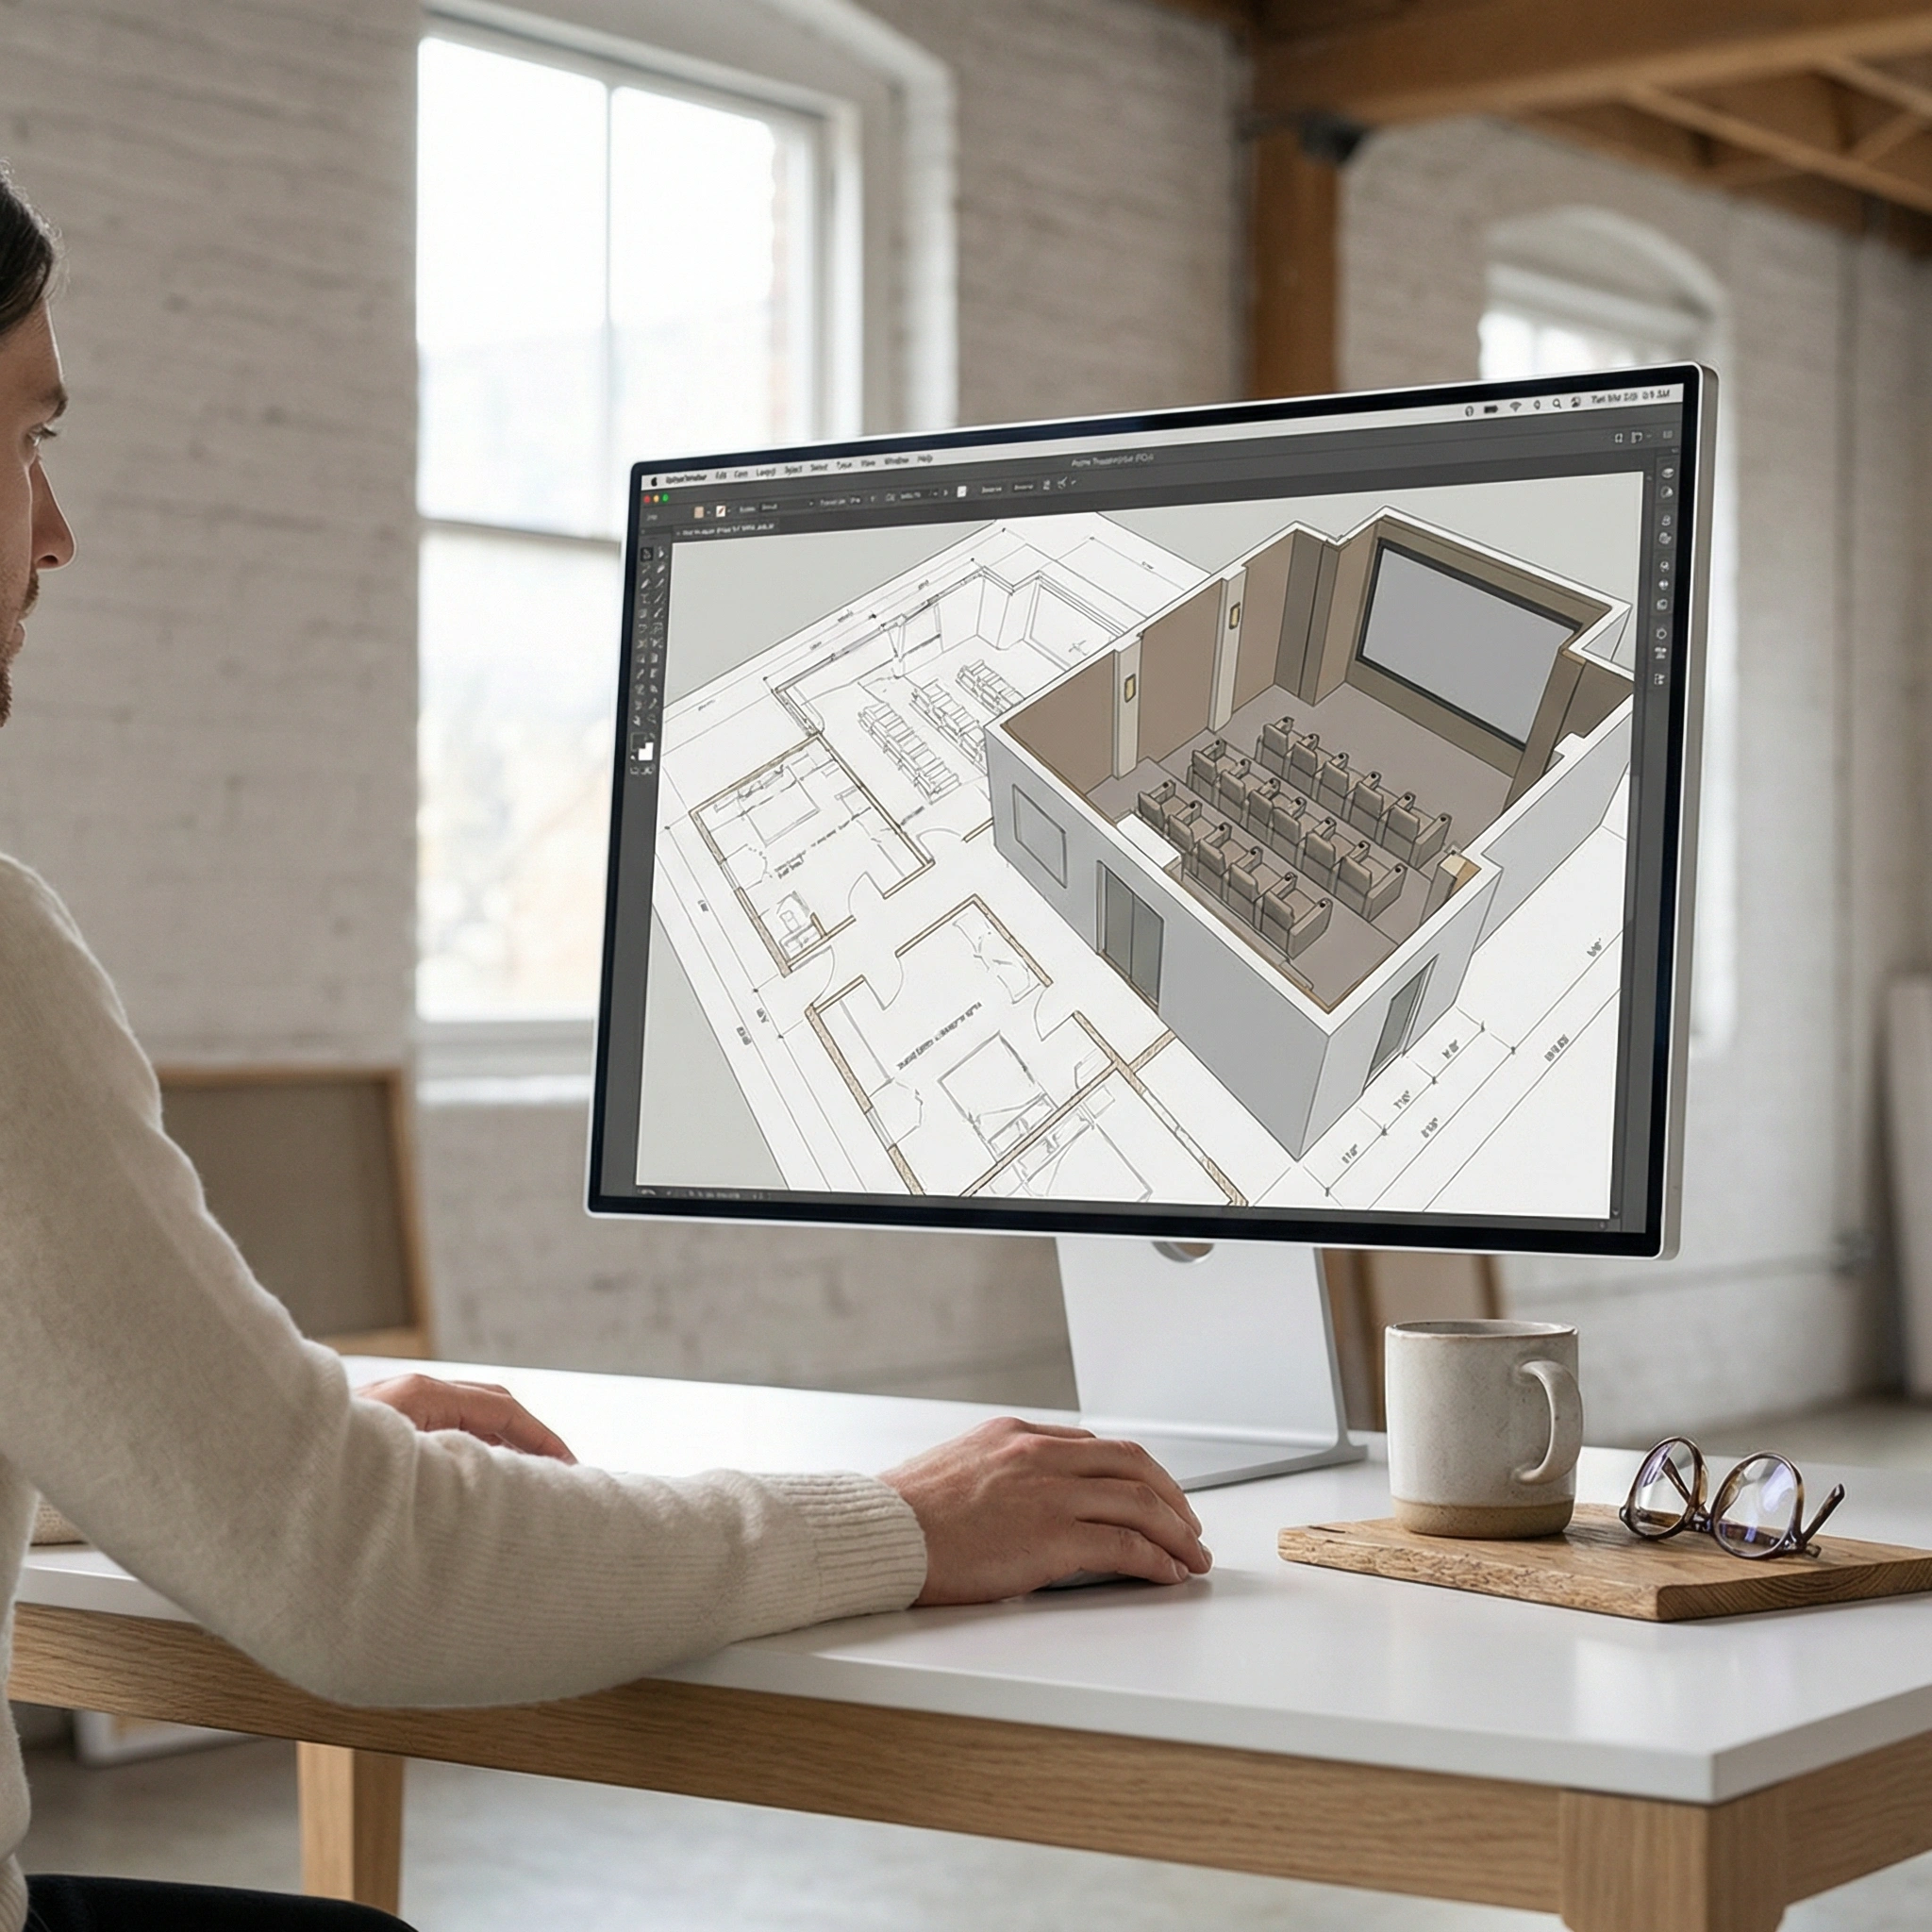
The challenge isn't motivation – it's execution. Most first-time builders either overspend in the wrong areas, underestimate room constraints, or skip acoustic treatment entirely. This guide covers the basics of building a home theater in a new home through five decisions that genuinely move the needle.
1. Plan the Space Before Touching the Budget
Room dimensions shape every other decision. Buy a projector before measuring the throw distance, and the whole setup gets compromised.
What Room Dimensions Actually Matter?
Start with these measurements before anything else:
- Depth: At least 15 feet allows proper viewing distance from a 100-inch screen
- Width: A rectangular room (longer than wide) is preferable – wide rooms cause audio imaging problems
- Ceiling height: Below 8 feet limits speaker placement and creates a closed-in feel
- Windows: Assess them at different times of day – a single uncovered window can wash out a projector image completely
The layout follows the room assessment. The optimal viewing distance for a 100-inch screen sits between 8 and 12 feet. Walkways need 36+ inches of clearance, and if a second seating row is planned, tiered flooring dramatically improves sightlines – though it adds construction cost.
Pro Tip: Settle the room layout fully before allocating any budget. Many builders overspend on displays and have almost nothing left for audio, seating, or acoustic treatment – which collectively matter more to the experience than screen resolution.
2. Choose a Display That Works With the Room
Screen choice is where enthusiasm tends to outpace logic. The display has to suit the specific room conditions – light control, throw distance, and seating position – not just look impressive on a spec sheet.
Projector vs. Large-Screen TV: A Direct Comparison
Projectors deliver the cinematic scale that makes a dedicated room feel like a real theater. But in a room that can't be fully darkened, a high-brightness 4K laser projector or a large OLED/QLED TV is the smarter call.
How High Should the Screen Be?
The center of the screen should align with the seated eye level – roughly 42 to 48 inches from the floor. Mounting it too high forces neck strain across a two-hour film. Projector throw ratio also needs to match the room's length; an incompatible ratio means either a tiny image or the projector hanging awkwardly close to the screen.
3. Take Audio More Seriously Than the Display
Anyone who has sat through a film with a great picture and weak sound knows which half carries the experience. Audio is where building a movie theater at home either genuinely succeeds or quietly disappoints.
A proper surround system for a dedicated room typically includes:
- An AV receiver with 7.1 channel processing (Dolby Atmos or DTS:X support is worth the added cost)
- A center channel speaker directly above or below the screen for dialogue clarity
- Left and right front speakers flanking the display
- Surround and rear surround speakers at ear level or slightly above
- A subwoofer placed in a front corner for low-frequency impact
According to 2025 CE Pro research, three-quarters of professional home theater integrators install six or more surround-sound loudspeakers per project, with 41% installing nine or more to support Dolby Atmos, DTS:X, and Auro-3D formats. That's the professional benchmark. DIY builds don't need to match it exactly, but it signals how seriously audio deserves to be treated.
Acoustic Treatment: The Step Most Builders Skip
Speaker placement alone doesn't fix a bad-sounding room. Hard parallel walls create a flutter echo that muddies dialogue and smears the soundstage. The solution is straightforward:
- Acoustic panels on the side walls and rear wall
- A thick rug on the floor
- Heavy curtains across any windows or reflective surfaces
- Bass traps in the corners
Note: Acoustic treatment and soundproofing are different things. Treatment controls how sound behaves inside the room. Soundproofing prevents it from leaving – or entering from outside.
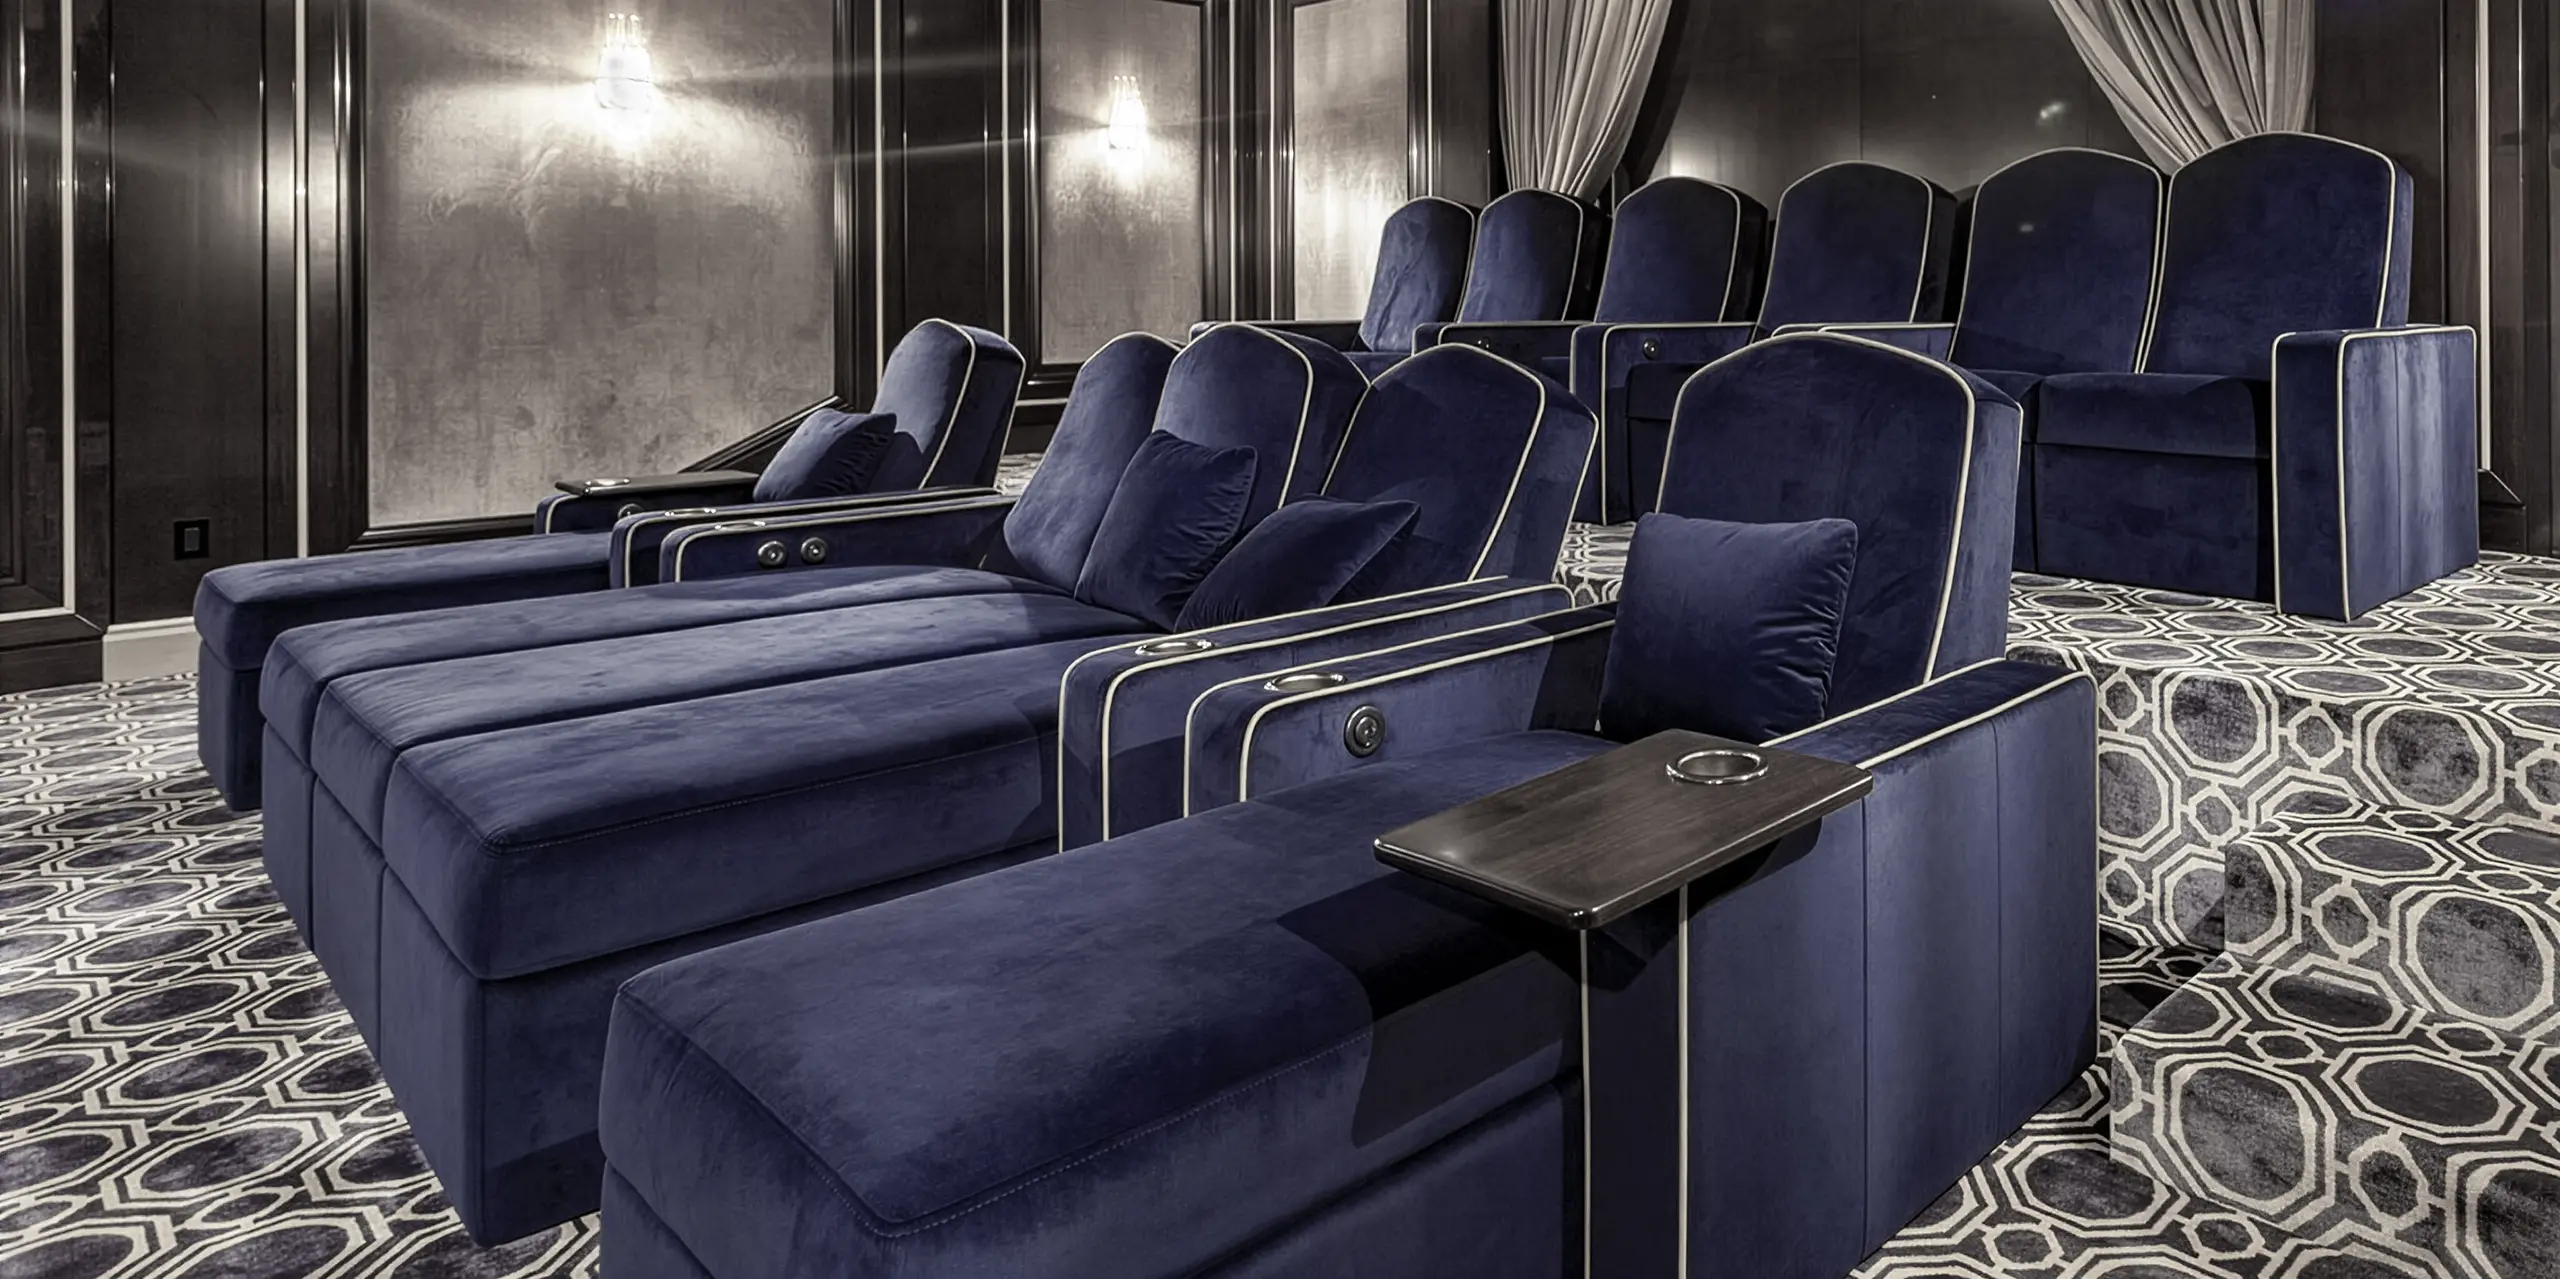
4. Build the Seating Layout Around Comfort, Not Just Looks
Seating is consistently the last decision made and the first one regretted. Impressive audio and visuals mean very little if the seat becomes uncomfortable 40 minutes in. This is one area where Elite HTS directly solves a problem most homeowners don't fully anticipate until it's too late.
What Seating Type Fits a Dedicated Home Theater?
Traditional recliners remain the most popular choice for dedicated rooms. Full-body support, built-in cup holders, charging ports, and the recline angle all contribute to genuine long-session comfort. The catch is depth – a fully reclined recliner extends 5 to 6 feet from the wall.
Wall-hugger recliners solve the space problem by reclining forward rather than backward, making them practical when depth is limited.
Modular theater couches offer layout flexibility, useful when the room doubles as a family or gaming space. The trade-off is lumbar support – modular sofas rarely match purpose-built recliners for extended viewing.
The seat's backrest angle, headrest height, and footrest extension all affect comfort across a three-hour film. A seat that positions the head 10 degrees too far forward becomes a neck problem by the second act.
Elite HTS offers commercial-grade home theater seating – custom-upholstered in any color, built in Canada, and backed by a 20-year warranty. That combination of construction quality and warranty coverage sets it apart from standard retail options, particularly for homeowners who want seating that holds up over years of regular use.

5. Layer the Lighting and Add Functional Accessories
Lighting is often treated as cosmetic. It isn't. The way a room is lit during and between films affects both eye comfort and how immersive the space feels. Getting this right is one of the final steps in the basics of building a home theater in a new home – and one of the easiest to underestimate.
Three Lighting Layers Every Home Theater Needs
- Ambient lighting: Dimmable ceiling fixtures or cove lighting for general use when the room isn't in movie mode
- Accent lighting: Step lights along aisles and low-level wall sconces that stay on during playback without causing screen glare
- Bias lighting: An LED strip behind the screen that reduces perceived contrast and minimizes eye fatigue during long sessions
A smart dimmer system tied to a single scene controller lets all three adjust simultaneously. One button press should dim the room, activate bias lighting, and cut any fixtures that could create glare – no manual switching required.
Accessories tend to be rushed or ignored. Cup holders, a dedicated snack station, cable management, and organized media storage aren't extras – they're what makes the room actually usable week after week. Plan for gaming console integration or VR-ready space even if it's not being added immediately; retrofitting is always more expensive than planning ahead.
Building a Movie Theater at Home: Planning Checklist
Before ordering anything, work through this sequence:
- Measure the room – ceiling height, window positions, door clearance
- Choose display type, size, and mounting position
- Plan seating layout and row spacing before purchasing
- Select audio components and identify walls for acoustic panels
- Design lighting zones and choose a smart dimmer system
- Add accessories – cup holders, snack station, cable management
- Do a dry run before finishing walls – check sightlines and speaker angles from the actual seating position
Proper planning, balanced spending, and well-chosen seating are what separate a home theater that stays satisfying from one that disappoints after the novelty fades. Even a compact room can deliver a genuinely cinematic experience when the fundamentals are handled in the right order.
Considering premium theater seating for the next home theater project? Request samples and specifications from Elite HTS – commercial-grade construction, custom upholstery in any color, built in Canada, with a 20-year warranty.
Frequently Asked Questions
How much space is needed to build a home theater?
A minimum of 12 by 15 feet works for a single-row setup. Two rows with tiered seating typically need at least 20 feet of depth.
What display suits a new home theater best?
A 4K laser projector with a 100-inch screen works well in rooms that can be fully darkened. Large OLED or QLED TVs are better for rooms with ambient light or limited throw distance.
Do recliners work in small home theaters?
Yes – wall-hugger recliners or compact modular seating deliver comparable comfort without requiring the full depth of a standard recliner. Learn more inside our guide to creating a luxury home movie theater in a small space.
Does audio setup require professional help?
Basic 5.1 setups are manageable as a DIY project. Dolby Atmos with ceiling-mounted height channels benefits from professional calibration, especially in irregular room shapes.