

Home theaters stopped being a celebrity perk somewhere around 2020. Today, a well-executed DIY home movie theater delivers genuine cinema-quality picture and sound – at a fraction of what professional AV companies used to charge. The gear has improved, installation has simplified, and the case for building one has never been stronger.
The numbers back this up. The global home theatre systems market is valued at over $52 billion in 2026, growing at a 20.1% CAGR – driven largely by residential buyers investing in dedicated media rooms and upgraded entertainment spaces. Millions of households are making this leap, and most are doing it themselves.
This guide covers every stage of a movie theater build: room assessment, display selection, sound installation, seating, lighting, controls, and the finishing details that separate a polished result from a frustrating half-measure.
Step 1: Plan Your Space – The Step Most People Skip
Planning isn't exciting. Buying a projector is. That gap in priorities is responsible for most DIY home movie theater failures, and it costs real money to fix after the fact.
Room dimensions, ceiling height, wall shape, and window placement all determine which equipment will actually work in a given space – before a single dollar is spent on gear.
What Room Dimensions Actually Work for a Home Theater?
A rectangular room with a ceiling between 8 and 10 feet is the most forgiving starting point. Irregular shapes, open floor plans, and low ceilings all create acoustic problems that speakers alone cannot solve.
Three things to check before anything else:
- Windows and natural light – Ambient light destroys projected image quality. Blackout potential should be confirmed before selecting a display type.
- Doors and vents – These affect both sound leakage and airflow, which matters more once a projector is running continuously.
- Existing electrical – Dedicated circuits for high-draw AV equipment prevent tripped breakers during action sequences.
How to Plan Your Seating Layout Before Buying Anything
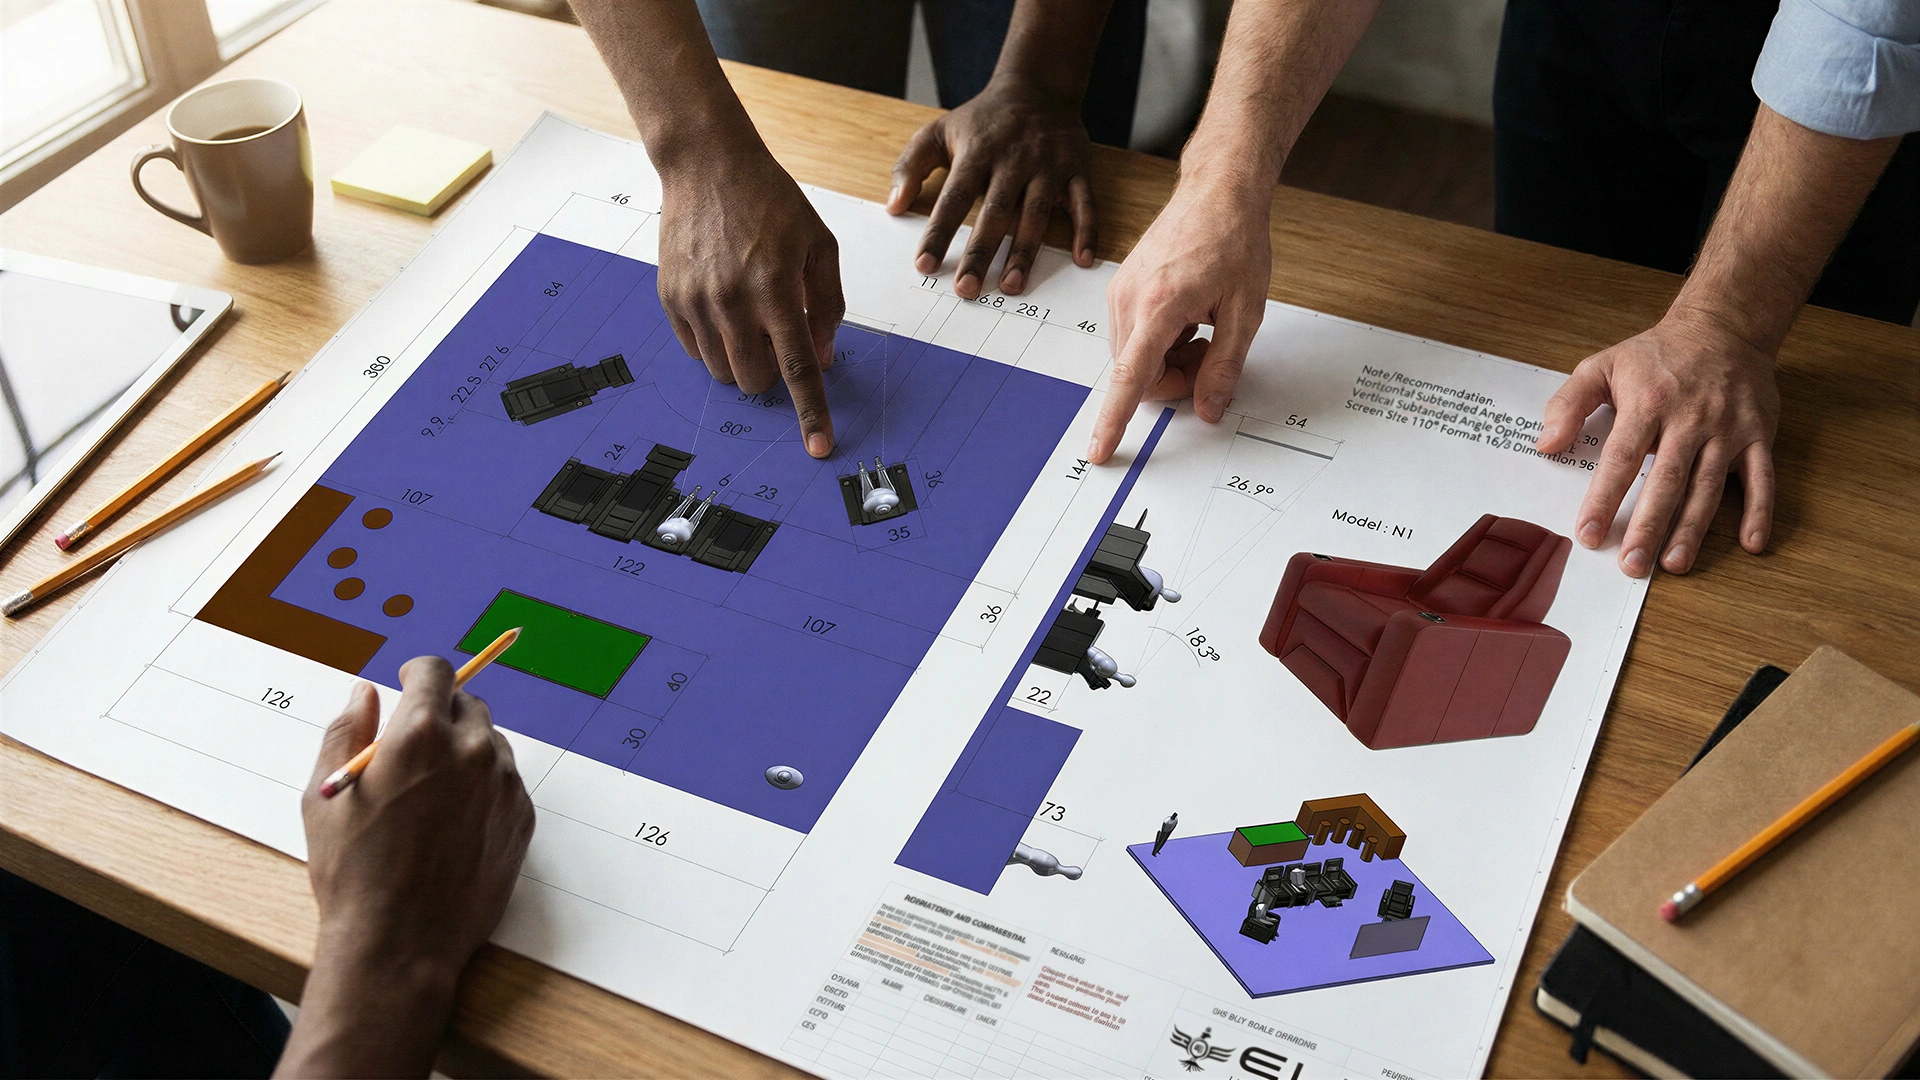
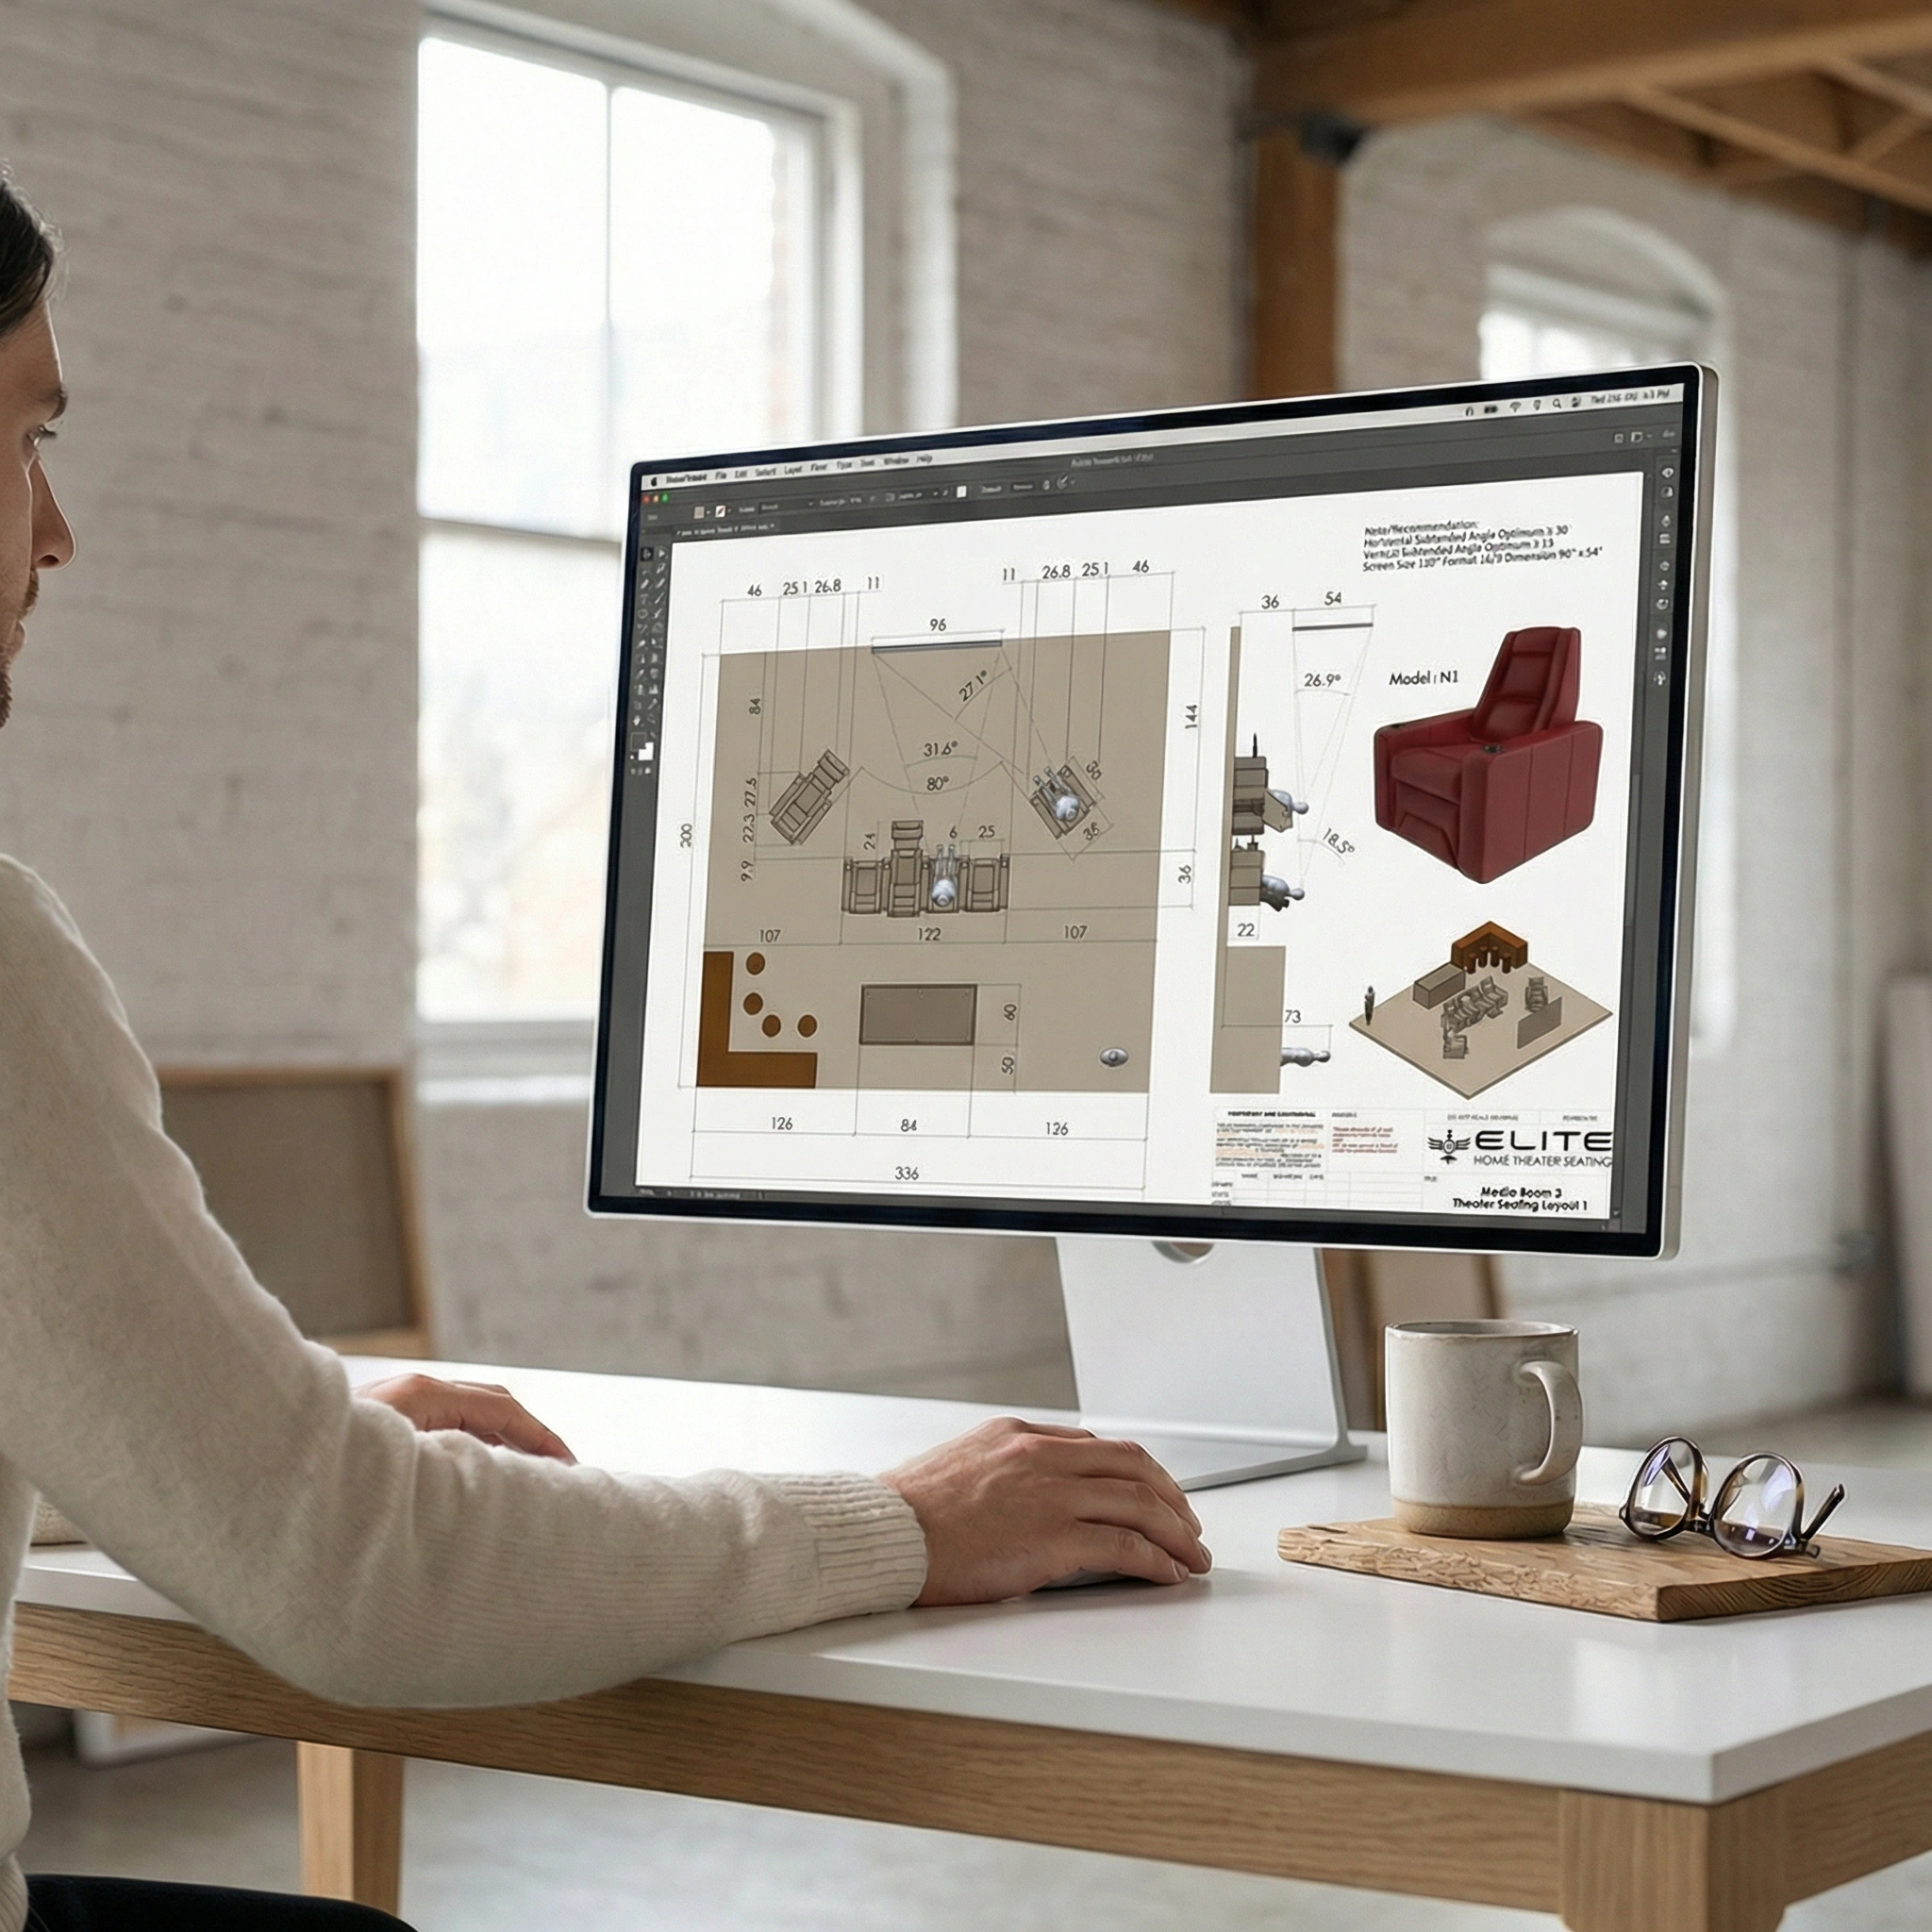
Sketch the seating rows, screen wall, and walking clearance on paper first. Each viewer needs roughly 18–24 inches of seat width, plus recline clearance behind if using motorized chairs.
For two-row setups, the back row typically sits 8–12 inches higher to preserve sightlines over front-row headrests. A tiered platform solves this, but it needs to be costed and planned before flooring goes down – not after.
Budget Breakdown: What a DIY Home Movie Theater Costs in 2026
Always add a 10–15% contingency. Surprises in construction are guaranteed – the question is only what kind.
Step 2: Choosing the Right Screen and Display
The display choice shapes everything downstream: throw distance, lighting requirements, screen surface, and room depth all depend on this decision. Getting it wrong means expensive changes later.
Projector vs. Large-Format TV: Which Is Actually Better?
Short answer: it depends entirely on the room.
Projectors deliver larger images – 100 to 150 inches is achievable in most rooms – and create a more convincingly cinematic experience. The tradeoff is light sensitivity. Without effective blackout curtains or a windowless room, image quality degrades noticeably.
Large-format TVs (75–100 inches) perform in any lighting condition, require no screen surface, and skip the lamp/lens alignment process entirely. A 4K OLED in a well-lit media room will look better than a budget projector in the same space.
For dedicated dark rooms: a short-throw laser projector paired with a high-gain screen. For multi-use living spaces: a 75–85-inch 4K TV with HDR support.
Understanding Throw Distance Before You Mount Anything
A standard projector needs roughly 1.5–2× the screen width in throw distance. A 120-inch screen (approximately 105 inches wide) requires 13+ feet of space between lens and screen.
Short-throw projectors compress that to 2–4 feet, making them viable for rooms where a traditional setup would be physically impossible.
Pro tip: Bias lighting – an LED strip mounted directly behind the display – costs $10–$200 and measurably reduces eye strain during long sessions. It also makes the image appear more vivid against a darker surround. It's one of the highest-value additions in any Do It Yourself home theater build.
Step 3: Installing the Sound System
Picture quality gets the attention, but audio is what makes a movie feel physical. A weak sound setup in an otherwise excellent room is a constant, nagging disappointment.
The standard starting point for a dedicated DIY home movie theater is a 5.1 surround configuration: center channel, front left and right, two surround speakers, and a subwoofer, all fed through an AV receiver.
Where Each Speaker Actually Goes
Placement matters as much as hardware quality. Follow these positions for a standard 5.1 layout:
- Center channel – directly above or below the screen, at seated ear level
- Front left and right – angled inward at 22–30 degrees from the center
- Surround speakers – 90–110 degrees to the sides, slightly above ear level
- Subwoofer – corner or side wall placement typically produces the strongest bass response
Do Acoustic Panels Make a Difference?
Yes – significantly. Hard, parallel walls create a flutter echo that muddies dialogue and blurs transients. Even basic acoustic treatment transforms a room's sound character.
Effective, budget-friendly options include:
- Fabric-wrapped acoustic panels on the front and side walls
- A thick area rug covering at least 70% of the floor
- Bass traps placed in corner junctions (floor-to-ceiling corners are most effective)
- Heavy curtains, which serve double duty as blackout and acoustic absorption
Wireless rear channel speakers are growing at the fastest rate in the home audio category, according to 2026 market data – brands like Sonos, SVS, and Klipsch all offer wireless surround solutions that pair cleanly with wired front stages. For a Do It Yourself home theater where running rear speaker cable through walls isn't practical, these are a legitimate and increasingly high-quality option.
Step 4: Seating – The Decision That Affects Every Hour in the Room
No other component gets more contact time than the seat. A viewer can adjust to a slightly smaller screen or live with modest bass. Spending two hours in an uncomfortable chair, though, is simply unpleasant – and it colors the entire experience.
This is the area where cutting costs consistently produces regret.
What Seating Types Work Best for a DIY Home Movie Theater?
The right seating depends on room size, row count, and how the space will be used:
- Commercial-grade recliners – ideal for dedicated single or multi-row theaters; individual posture control and precise sightline management
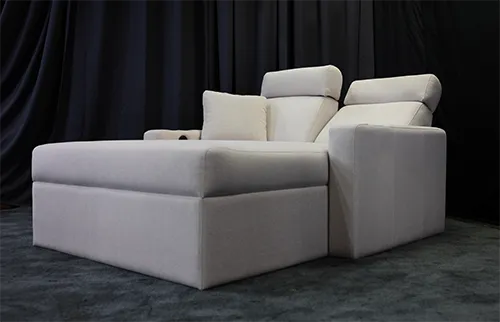
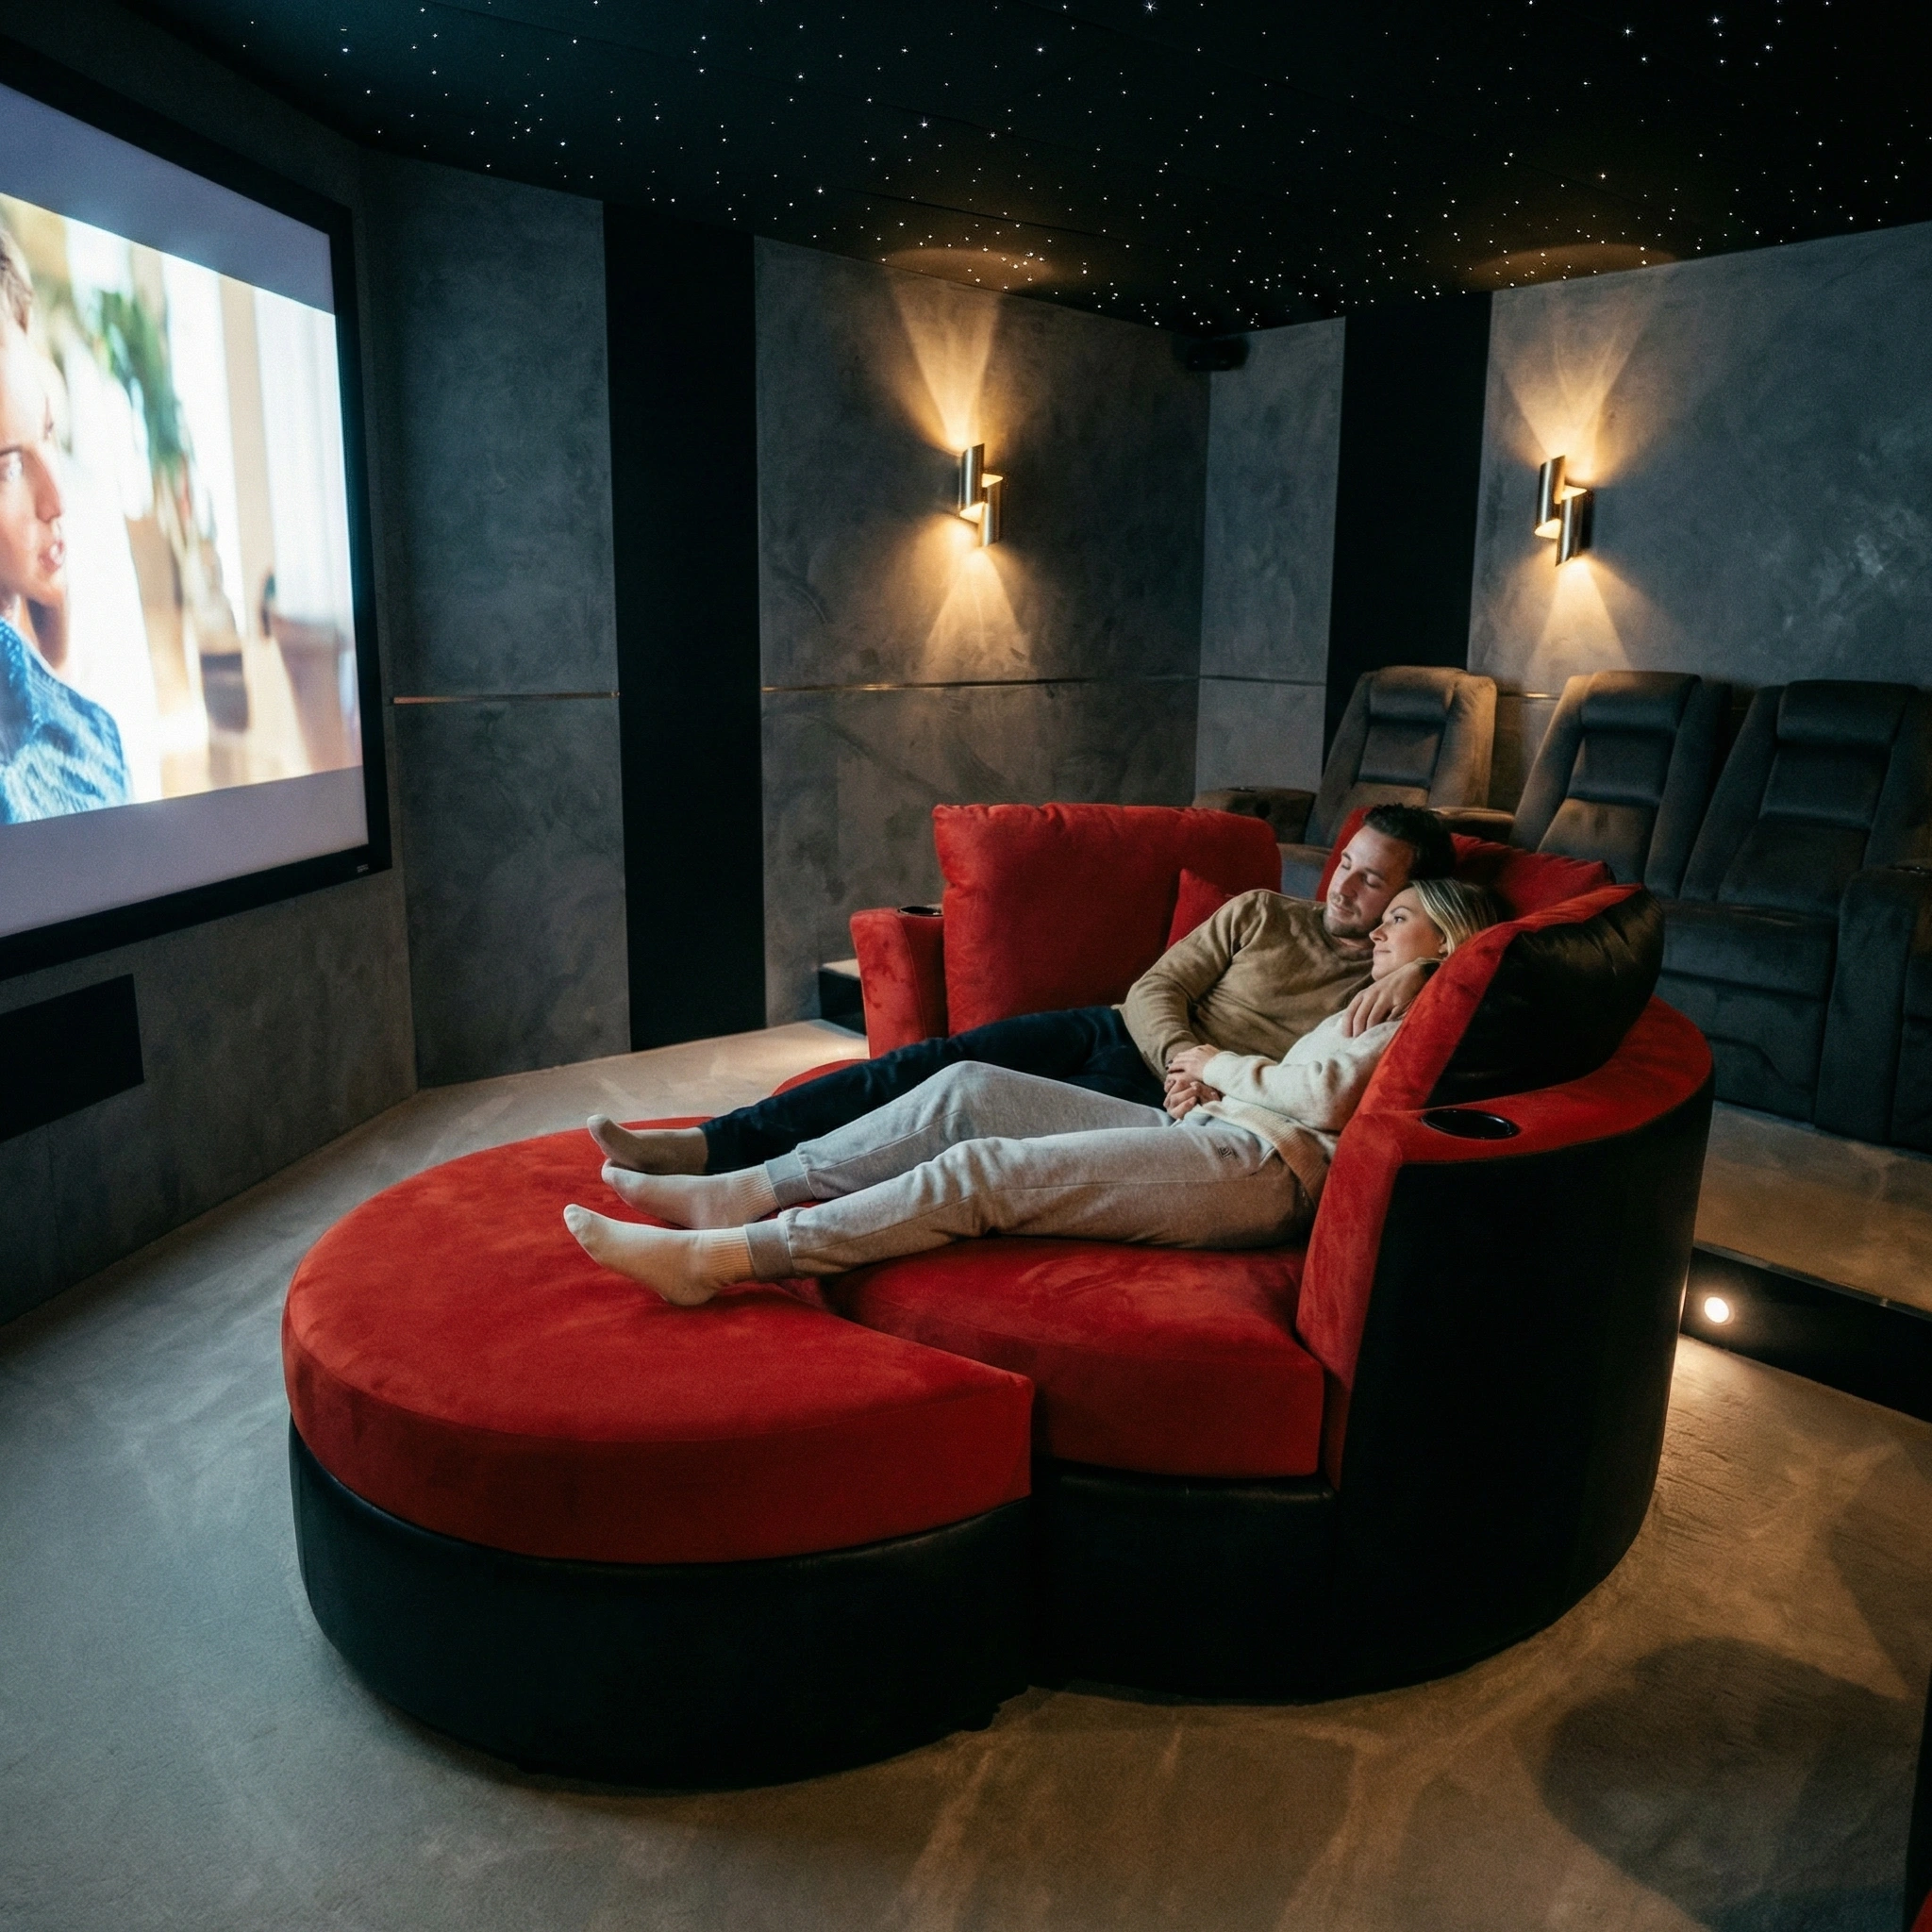
- Cuddle couches – wider and deeper than standard loveseats, designed for two adults in genuine comfort; well-suited to front rows or smaller rooms
- Modular sectionals – flexible configuration that adapts to unusual room shapes or combined living/theater spaces
- Wall-hugger recliners – recline fully with just 2–3 inches of rear clearance; the practical choice when room depth is limited
Elite HTS manufactures all of these categories in Canada, using high-density foam and commercial-grade frames. Upholstery options include top-grain leather, silk leather, and Cinesuede – each available in custom colors. Every piece carries a 20-year warranty and is engineered with input from a chiropractor for long-term ergonomic support.
How to Arrange Seating for Correct Sightlines
Single-row setups work well in rooms up to 14 feet deep. Two-row configurations need the back row raised on a platform, with enough depth between rows for full reclining without contact. A layout planning resource from Elite HTS helps dial in exact row spacing before any seating is ordered.
The rule of thumb: the distance from the screen to the front row should be roughly 1.5–2× the screen's diagonal measurement for a comfortable viewing angle.
Step 5: Lighting – What Separates a Finished Theater from a Dark Room
Lighting is the detail that distinguishes a true DIY home movie theater from a room that simply has a large TV. Done right, it's invisible during playback and functional between sessions.
The Three Lighting Layers Every Theater Needs
1. Ambient (overhead): Recessed cans on a dimmer circuit handle general room light. These go dark during playback.
2. Step/aisle lighting: Low-level LED strips along stair risers or aisle edges. They stay on during movies – just bright enough to navigate safely, dim enough not to wash the screen.
3. Accent lighting: Cove lighting along the ceiling perimeter, or LED strips behind the screen wall. These create depth and make the room feel finished rather than utilitarian.
Smart lighting platforms – Lutron Caseta, Philips Hue, or similar – allow all three layers to be controlled with a single scene. A "Movie" preset dims overheads to zero, activates bias lighting, and dims accent strips to 10% in one tap. Once programmed, it gets used automatically every session.
Step 6: Control Systems and Media Integration
A theater with five separate remotes isn't finished – it's just assembled. Integration turns a collection of components into a single, coherent system.
How to Build a Clean Media Hub
Most 2026 setups center on the AV receiver as the primary signal hub. Common sources include:
- 4K Blu-ray player – for the highest-quality local playback
- Apple TV 4K or Nvidia Shield – for streaming with full HDR and audio passthrough
- Gaming console – connected via HDMI 2.1 for 4K/120Hz gaming support
The receiver handles source switching, surround decoding, and video passthrough to the display – one cable out, everything managed through one interface.
Cable management deserves real attention. Surface-mounted raceways or in-wall conduit runs are both viable for a Do It Yourself home theater. Wireless HDMI extenders and wireless subwoofers reduce the cable count where wall routing isn't practical. Integrating media sources with seating layout is worth thinking through early – the two decisions interact more than most people expect.
Step 7: Accessories That Complete the Experience
The functional extras are what make a theater feel deliberate rather than assembled from leftover parts.
Worth budgeting for:
- Snack station – a mini-fridge or compact beverage cooler recessed into cabinetry, paired with a countertop popcorn machine; more practical than it sounds and heavily used
- Cup holders and swivel trays – Elite HTS seating includes optional built-in cup holders and swivel tray inserts in multiple wood finishes; these matter during four-hour extended editions
- Gaming integration – HDMI 2.1 input on the receiver plus a low-latency game mode on the display keeps input lag under 10ms for serious gaming use
- VR-ready space – clearing the center floor area and adding a ceiling-mounted tracking anchor prepares the room for headset use without reconfiguration
Step 8: Mistakes That Derail a Movie Theater Build
Experience with failed installs tends to cluster around the same errors. Avoiding them saves both money and frustration.
The most common problems – and how to prevent them:
- Buying display equipment before measuring throw distance – a 120-inch screen in a 12-foot-deep room doesn't work with a standard projector. Confirm the throw ratio first.
- Skipping acoustic treatment – bare drywall and hardwood floors degrade dialogue clarity regardless of speaker quality. Even budget panels make a meaningful difference.
- Overcrowding seating – too many chairs means no one can recline properly. Four seats configured correctly beats six seats where nobody's comfortable.
- No forward planning for upgrades – running conduit during construction costs almost nothing. Adding it after flooring and walls are finished is expensive. HDMI 2.1 pathways, overhead Atmos speaker rough-ins, and extra circuits are all worth including from the start.
Step 9: Final Testing Before the Room Is Finished
Testing before the room is fully furnished is the only time adjustments are still easy.
Run through these checks before declaring the build complete:
- Play a dialogue-heavy scene – listen for echo, flutter, or muffled center channel
- Play a scene with wide a dynamic range – confirm bass extension and surround imaging
- Play a fast action sequence – check for motion blur, judder, or sync issues
- Walk every sightline from every seat – confirm no seat has an obstructed view
- Check for screen reflections from accent lighting at different dimmer levels
- Verify all remote and automation scenes trigger correctly from both rows
Scheduled maintenance after the build: clean projector filters every 3–6 months, recalibrate audio after major furniture changes, and update AV receiver firmware when new codecs are released.

One Last Thing Before You Start Ordering Equipment
Seating affects every hour spent in the room – more than the display, more than the speaker brand, more than any accessory. It's also the component most buyers underestimate until they've been sitting in it for three hours.
Considering a cuddle couch, recliner, or modular sectional for the build? Request samples and specifications from Elite HTS – Canadian-built, commercial-grade theater seating available in any upholstery color, designed with chiropractor-engineered ergonomics, and backed by a 20-year warranty.
Frequently Asked Questions
What is the easiest DIY home movie theater setup for beginners?
A 75–85-inch 4K TV, a soundbar with a wireless subwoofer, and two quality recliners. No calibration required, no screen surface needed, and the result is dramatically better than a standard living room setup.
Can a small room work as a home theater?
Yes. Rooms as small as 10×12 feet work well with a short-throw projector or a 65-inch TV, compact acoustic treatment, and wall-hugger seating. The key is selecting equipment that fits the room's proportions rather than forcing full-sized gear into a constrained space.
Is a projector actually better than a TV for a DIY home theater?
Projectors produce larger images for the money and a more distinctly cinematic feel. TVs outperform projectors in rooms with ambient light and require no screen surface or lamp maintenance. The better choice depends entirely on the room's lighting control and available throw distance.
What seating works best in a small home theater room?
Wall-hugger recliners and cuddle couches. Both recline fully with minimal rear clearance (2–3 inches), which preserves depth for aisles and equipment. Compact doesn't have to mean uncomfortable – the right seat in a small room beats the wrong seat in a large one.
How much does a DIY home movie theater cost in 2026?
Entry-level builds run $2,000–$4,000. A mid-range setup – quality seating, a 4K projector or large TV, and a 5.1 sound system – lands between $5,000 and $12,000. High-end dedicated rooms with tiered platforms, premium seating, and Dolby Atmos setups typically exceed $15,000.
Is professional installation necessary for sound and display?
Not for most of it. Modern AV receivers include automatic room calibration (Audyssey, Dirac, or similar), and projector mounting is well within DIY capability. In-wall electrical work and speaker cable runs through finished walls, however, are safer with a licensed electrician or AV installer.